This guide intends to explain the process to connect your disabled iPhone to iTunes without losing data.
The iPhone is disabled when you enter the wrong password many times. So, you cannot recover it and need to connect to iTunes.
But, it can cause data loss under certain conditions. Sometimes, your iPhone is disabled temporarily while it can also disable permanently.
In the latter case, the recovery process is different. Before enabling your device, let us understand its real status.
Step 1: Diagnose the Disable Status
iPhone allows you to enter the wrong password a few times. However, if you keep on entering the wrong password multiple times, it will be locked permanently.
For example, if you enter the wrong password 5 times, your iPhone will be locked for 1 minute. The time increases with the number of wrong attempts.
It becomes disabled for 60 minutes on attempting the wrong password 9 times. You can attempt again after waiting for the said time.
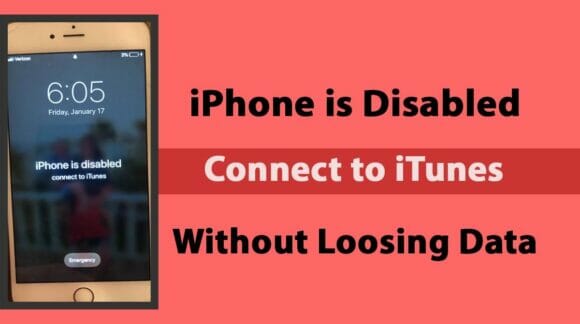
However, if you attempt 10 times, your iPhone will be disabled and locked completely. The screen reads “iPhone is disabled, connect to iTunes”.
Step 2: Check for the Recent Backup
If your iPhone automatically backup the data to iTunes or iCloud, you will be saved from hassle. Sometimes, you manually back up the data.
If you have ever connected your device to a computer for iTunes backup, the data is safe.
So, you need to confirm whether the data is stored in any back up or not. The process is as follows;
Open your Mac or computer and launch iTunes. Click on ‘Summary’ and look for ‘Backups’. Here you can see the latest backup with date, time, and file size.
Moreover, you may have backed up your iPhone data to some third-party app like Google Drive, OneDrive, or Dropbox. Try to remember if you have created any such backup.
Step 3: Try to Backup the Disabled iPhone to iTunes
Your iPhone is disabled and you cannot operate it, but still, there is the possibility that you can back up the data. Follow these steps;
- Connect your iPhone to your computer or Mac using a USB cable. Always use the USB cable given with your iPhone.
- Now, open iTunes on your computer and wait until it detects your iPhone.
- On the left of the iTunes window, tap the device icon.
- Next, click on ‘summary’ on the sidebar.
- Choose the ‘Backup Now’ option appearing under ‘Manually Backup and Restore’.
- Tap ‘Done’ when the process is complete.
Step 4: Unlock the iPhone
After you have backed up the data to iTunes, unlock your device using some third-party apps.
Even if iTunes is unable to detect and backup your disabled iPhone, you can still use third-party apps such as ‘UnlockGo’ and ‘iMyFone LockWiper’.
Both these programs can unlock your iPhone without losing the data.
UnlockGo
This app helps to remove the 4-digit or 6-digit passcodes and can also bypass Face ID and Touch ID. In addition, you can also use this app if your iPhone screen is broken, frozen, or locked.
A great advantage of this app is that it works with all iOS devices and is very easy to use. By following these guidelines, you can unlock your iPhone;
- On your computer or Mac, download and install the ‘UnlockGo’ app.
- Launch the program and choose the “Unlock Screen Passcode” option.
- Connect your iPhone to your computer using the USB lightning cable.
- UnlockGo will soon detect your iPhone, click on the “Start” button to initiate the process.
- If your device does not have the latest firmware, the program will ask you to download it.
- Choose “Download” and wait for the process completion. Then click on the “Unlock Now” option, it will take a few minutes.
- In this way, you can unlock your disabled iPhone without losing data.
iMyFone LockWiper
It is a great app that is compatible with all iOS devices. It can unlock your broken, disabled, and unresponsive iPhone.
This program easily removes the passcodes, Apple ID, and Face ID. However, it deletes the data.
So, make sure you have backed up all the important files. You just need to follow these simple steps;
- On your computer, download and launch the iMyFone LockWiper program.
- Connect your iPhone to the computer using the USB cable and click on the ‘Start’ button.
- Follow the on-screen instructions to put your iPhone into DFU Mode.
- Download the latest firmware and then choose “Start Unlock”.
- Enter the PIN “000000” and tap the ‘Unlock’ button.
- In a few minutes, this program will unlock your device.
Step 5: Restore the Data
Once you have unlocked your iPhone, you can operate it. Since all the data on your device has been deleted, you need to restore it. The process is as follows;
- Connect your iPhone to a computer or Mac through a USB data cable.
- On your phone, go to ‘Apps & Data’ and tap on ‘Restore from Mac or PC’.
- Open iTunes on your computer and click on the name of your iPhone.
- Finally, choose ‘Restore Backup’. In a few minutes, all of the data will be restored to your iPhone.
Final Words
While using your iPhone, be careful and do not attempt the wrong passcode over and over again. Because it will unlock your iPhone and will put you in great trouble.
Hence, you need to remember this point to avoid any hassle. However, if you accidentally disable your iPhone completely, follow the guidelines given in this article.
Back up the data to iTunes, unlock your iPhone using certain software programs, and finally, restore the data.
We hope, with this guide, your quest ‘iPhone disabled connect to iTunes without losing data’ ends.